A Step-by-Step Guide to Outlining Text in Illustrator, Photoshop, and InDesign
What does it mean to outline a font?
Outlining fonts involves turning text into objects. This process means the font files do not need to be installed on another computer for the files to open correctly.
Why do I need to outline fonts?
When an artwork file is opened on another computer system it will search that system for the fonts in the file. If it cannot find the fonts it will offer to substitute the font, or open with a default font. Either is not satisfactory for reliable reproduction of the artwork. Even if it substitutes with a font of the same name, that font could be slightly different, rendering unpredictable results.
Outlining prevents this from happening by converting the text to images, so the computer ceases to recognise it as text. Be sure to proof your text before outlining, because it cannot be edited afterwards. It is advisable to keep an original master file with the fonts still in place. This can be referred to if required.
Outlining fonts in Adobe Illustrator
1. Ensure all layers are unlocked. Go to the main menu > Window > Layers and remove the padlock icon from all the layers.

2. Select all fonts. To be sure everything is selected, in the main menu, go to Select > All. It doesn’t matter if non-text objects are also selected.
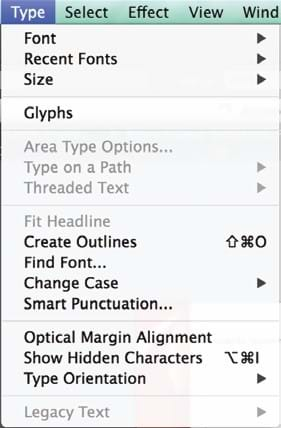
3. To Create Outlines: in the main menu, go to Type > Create Outlines, as shown on the right.
To be sure all fonts are outlined, lettering with have nodes present when selected, like the sample below.

4. Click "Save As' to save file with a new name, which will preserve the original Master File.
Did you know?
WE RUN TRANS-TASMAN CAMPAIGNS
We work with our sister company in Sydney to deliver truly Trans Tasman campaigns. The combined team will take care of all the production, project management and logistics in both New Zealand and Australia, ensuring your budget is optimised and your stress levels are reduced!